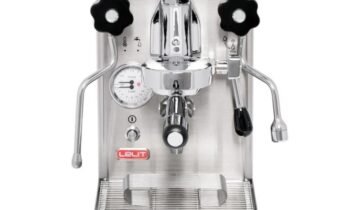
Replacing the spring in your Gaggia Classic espresso machine is a crucial maintenance task that can significantly enhance the machine’s performance and longevity. For a comprehensive visual demonstration, you can also refer to our YouTube guide:
This written guide complements the video, ensuring a smooth and effective replacement process.
Table of Contents
- Introduction to Gaggia Classic Spring Replacement
- Why Replace the Spring?
- Tools and Materials Needed
- Step-by-Step Replacement Instructions
- Common Issues and Troubleshooting
- Maintenance Tips Post-Replacement
- Additional Resources
1. Introduction to Gaggia Classic Spring Replacement
The Gaggia Classic is a popular choice among coffee enthusiasts, known for its durability and exceptional espresso quality. However, over time, wear and tear on its internal components, including the spring, can affect its performance. This guide provides detailed steps to restore your machine to its optimal state and ensure consistent espresso quality.
By replacing the spring, you address issues such as pressure inconsistencies, wear-related damage, and declining espresso quality. Let’s dive into why and how you should approach this task.
2. Why Replace the Spring?
The spring in the Gaggia Classic is an integral component of its brewing system. Here’s why replacing it is vital:
Common Issues with Old Springs:
- Tension Loss: Leads to reduced or inconsistent water pressure.
- Rust and Corrosion: Exposure to moisture can degrade the spring over time.
- Performance Decline: A worn-out spring may result in uneven extraction, affecting the taste and consistency of your espresso.
Benefits of Replacing the Spring:
- Restores optimal brewing pressure.
- Ensures consistent espresso extraction.
- Extends the overall lifespan of your machine by preventing further wear on related components.
To purchase a high-quality replacement spring, check out our Gaggia Classic 9 Bar OPV Spring product page.
3. Tools and Materials Needed
Before starting the replacement process, prepare the following tools and materials:
Essential Tools:
- Screwdrivers (Phillips and flathead)
- Hex keys
- A small container to store screws and loose parts
Materials:
- Replacement spring (ensure compatibility with Gaggia Classic)
- Food-safe lubricant
- Clean cloths or towels
Pro Tip:
Having the correct tools and a clean, organized workspace will make the process significantly smoother and safer.
4. Step-by-Step Replacement Instructions
This step-by-step guide will ensure a thorough and hassle-free replacement process:
Step 1: Prepare the Workspace
- Unplug the machine and allow it to cool completely.
- Lay a towel beneath the machine to catch any spills or loose components.
Step 2: Disassemble the Machine
- Remove the top cover using a Phillips screwdriver.
- Carefully detach the group head assembly, which houses the spring.
- Place all screws and components in a container to avoid losing them.
Step 3: Remove the Old Spring
- Locate the spring within the group head.
- Gently extract the spring, noting its orientation and placement.
Step 4: Install the New Spring
- Position the replacement spring in the same orientation as the old one.
- Ensure it is securely seated before proceeding.
Step 5: Reassemble the Machine
- Reattach all disassembled parts in reverse order.
- Tighten screws evenly but avoid over-tightening, which could damage components.
Step 6: Test the Machine
- Plug the machine back in and run a test brew.
- Monitor pressure levels and espresso consistency to confirm successful replacement.
To accurately measure pressure post-installation, consider using our Gaggia Classic Pro/Evo Mountable Pressure Gauge Tester.
5. Common Issues and Troubleshooting
Replacing a spring is a straightforward process, but occasional issues may arise:
Troubleshooting Tips:
- Misaligned Spring: Recheck the orientation and seating of the spring.
- Leaks: Inspect seals and ensure screws are tightened correctly.
- Persistent Pressure Issues: Verify the replacement spring’s compatibility with your Gaggia Classic model.
6. Maintenance Tips Post-Replacement
Proper maintenance is crucial to maximize the longevity and performance of your newly replaced spring:
Key Tips:
- Clean the group head and internal components regularly to prevent buildup.
- Apply food-safe lubricant to moving parts to reduce wear.
- Conduct annual inspections of the spring to identify early signs of wear or damage.
Additional Advice:
Consider setting a regular maintenance schedule to avoid unexpected machine downtime and maintain optimal espresso quality.
7. Additional Resources
For a comprehensive visual walkthrough of the spring replacement process, watch our detailed YouTube video.
This video complements the written guide by demonstrating each step clearly, helping you achieve a successful spring replacement.
By following this guide and maintaining your Gaggia Classic properly, you can enjoy consistently high-quality espresso for years to come.


 No products in the cart.